Monday, December 7, 2015

Wrapping soap


Making soap is great!  It's fun, it makes nice gifts and I love to use it myself!  But if you are going to give this stuff as a gift, it's a bit nicer to have it wrapped in some manner rather than just handing off some naked bars to someone... Which I do frequently still, but none the less, I recognize that it may be nicer if it is wrapped.  However, soap is stupid to wrap, it's not all that square (though with the mold it is better!), and the most realistic option is to wrap and label each bar... which means a lot of bars to wrap, and even if I do try to get the heart shaped or odd shaped bars wrapped, they are still pretty messy looking.  Now I haven't figured out the solution to the weird bar shapes, however this year I am very happy with our wrapping efforts.  (wow that's a long introduction, I must have a final to write or something).  In the past, we have done the cigar bands (eh... ) I bought some old thin accounting paper from Scrap last year which was pretty good to use, but this year... I got the kids to do some bubble prints for the wrappers.


How to do bubble prints (I was too busy making prints to take pictures of the process sorry, but I liked it so much that I still want to write it down!):

  • A lot of tempura paint (a few table spoons at  least... stick with stronger colors)
  • Shallow dish (not deeper than say a salsa container)
  • a good strong squirt of dawn or other dish soap (when I need serious dish soap, I use blue dawn, for my dishes though I prefer the frou frou smells of mrs. meyers for every day). 
  • about 1-2" of water to cover.

Mix thoroughly

BLOW gently with the straw (only caveat  is the reminder to BLOW not suck on the straw as they may do without thinking.... Owen).

Gentle blowing too, to make a nice tower of bubbles without overflowing your container.

Take your paper and just set it down on top of the bubbles.


These make cool prints at the very least. They dried quickly and were ready to use minutes after we were done.  More to the point of this post is that they make perfect wrappers for soap!  Get-it... bubbles... soap... They turned out much nicer looking than I hoped, really more of a marbled effect.

Fun for the kids, fun for me too... does end up being a little splattery, but not terrible if you don't go all crazy on the bubble blowing.  Clean-up went well, probably because of all the soap!
(pictures soon... or really you will probably just get a bar of soap!)

AAnd just because I have them here and am remembering to post them.  Mom made G. this amazing grey awesome flannel dress/jacket (gets used as both) and we both LOVE it!  It looks so good on her and the flannel is so wonderful that I bought some (similar) for a shirt for myself and an orange colorway for a robe for Owen!


For whatever reason I don't have a great picture of Grace's Christmas Dress, but I did make it, our of a red velvet that hides many errors (the hem and zipper are a bit wonky), but it is so cute on her, and turned out really nicely (and she wore it every christmassy opportunity)

 The vest for Owen I made a while ago, but don't think I posted.  It's pretty great on him, though for him, it serves as an excuse to look dressed up without having to put on a button up shirt or collar.  The reverse is an awesome cotton and steel arrow print that I love.


Sunday, November 1, 2015

Figgy raglan, Basil fox and the unicorns

So I made a few more figgy raglan shirts... but only one pictured yet, as it is now November and the kids still have a hard time giving up their summer clothes!  I Love this fabric though, I bought the very last of what fabric.com had, so had to make the sleeves in a contrast navy blue (that I used to make a dress for myself too!).  
 I made the shirt much longer and traced the hem from another favorite dress.  Then had just enough fabric to make a sweet little kangaroo pouch For the hem, I tried to just use some of the blue, but with the curved hem it pulls a little bit funny, it got better with washing, but still, something to work on.
 and... and she actually wears it!  I made a similar shirt... raglan, cut dress length but no pocket (mistake really)  I love wearing it though it is a little sack like, though super comfortable!  When we had the indigo vat this summer, I dumped two skeins of rope into them and really let them soak.  Owen and I finally pulled together these two baskets.  One to corral our magazines that get stashed everywhere and one to sort of hold the games.
 oh and this one. a Basil Fox for Leslie's little guy Harrison.  He had to have black 'cause it's leslie, but I kept it a bit off the monochromatic 'cause I think they are super cute in the little pendeltonesque flannels.

 Finally, for today, you can't really see it all that well, but a cute tank that I made Grace this summer that she NEVER wore in spite of the awesome unicorn in a garden pattern and cool breezy feel.  Never that is until 1 November after a torrentially rainy halloween (though in her defense it's cool, but it's not all that cold out now. ) It has butterfly sleeves a cross over and tie back and a ruffle hem.

Sunday, August 23, 2015

Shibori and Indigo


So I have been totally hankering to dye with indigo for a while now, and finally finally did it!  I got the Jacquard kit and it is really easy and seems to last indefinitely about two weeks and a lot of items dyed.  
 We wrapped, folded, twisted
 glued, dipped, swirled...

 and came up with a ton of beautiful linens and shirts!
 My kids just couldn't wrap their head around only using blue, when clearly tie-dye has so many more color options, so I also grabbed a tie-dye kit for them to work on, so we had a very colorful textile based play-date.


The fall-out is that there are no safe whites in the house any more.  I found one more shirt, this was done with the blue gel elmer's glue as a resist then dip dyed.

I was washing sheets yesterday and started eye-ing them as well, but haven't got the guts just yet to do something that dramatic (after using the vat of dye a lot already!), but maybe a few pillowcases....

 Scooter posing with my beautiful dropcloth... some Pollack printing, tie-dying, shibori and house painting make for a work of art in itself!
 Update:  I did pull together a few pillow cases from the fabric I dyed... I love adding them to the bed!
also, just some notes on this process.  Believe in the resist.  The first batch (biggest by far), V and I were a little nervous, as they looked SOOOO dark, and it was so much fun, we basically dipped fairly quickly (20-30 seconds) and after rinsing and everything, I think they definitely could do with some more dye.  The dark pillow on the bed was left in for about 5 minutes and then dried angiven 5 more min, plus I really worked the dye into the fabric as much as I could (that one with the polka dots as well).  and I love the color even more!
AAAnd I found my shea butter soap recipe so am putting it here so I hope not to loose it again!  I made my first batch this year today...


I did it with the red palm oil from TJs and misread the recipe and put in a bit too much of the palm oil... I did try to fish some out, but it was mostly all melted and mixed, so instead of 12 oz, I probably had at least 17... I dialed the olive oil back since it was the last oil I added, but we'll see if it works out.  Since it was so orangey, I made a citrus (Tangerine, Lemon, Orange, lemongrass) and cedar bar.


Next batch for this year, 9/21 was made with half sandalwood amyris with some avocado oil (topped with a little basil), and all of the bars in the heart and square molds are basil tangerine lime. I split one batch of the shea butter soap.

Sunday, August 16, 2015

end of summer projects

City shorts with some of my current favorite fabric, I also made myself a scout tee with it!
Grace loves these shorts and wears them whenever she has them!  We left them at Grandma Terri's house and I had been looking for them.  We were so happy when she sent them to us!
This is my first scout tee, a cool woven t-shirt pattern!  I have some shot cotton here, it's very nice and soft, I also love the one with the above fabric, but don't have any pictures yet.  I made the sleeves with the cotton-linen blend that is so very nice, but it needed some stitch reinforcing as it pulled out of the stitches with its first washing.  I've reinforced it and hopefully it will hold now.
I inadvertently bought the same shot cotton for the dress/tunic for Grace below.  It's from the Japanese sewing book "lesson Plan", and I made my big 5/almost 6 year old the 120 cm an it fits her like a sweet dress.  These aren't the best pictures, but it looks very sweet on her.

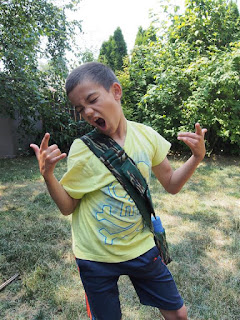
and for O... after months of asking that I make him a "Sachel" by which he meant something a bit more like this bandoleer, I finally pulled something together and he loves it (though wishes it was a bit wider in the middle).
It has pockets on both sides and a water bottle holder at the bottom, and looks very cool.  He is happy that my idea for pencil holders look like bullet holders.
and for another project... sun prints!  We collected some big algae kelp during a weekday visit to pacific city, and then did some solar prints at home!


I thought they were wonderful fun, but the kids, in part because the dye is pretty stinky, had a shorter attention span for this project.  Owen did make a wonderful dish towel.  
everyone enjoyed the finished products!


Sunday, August 9, 2015

Visit with Grandma Mary

a manicure by Grace (silver sparkles for Great-Grandma!).
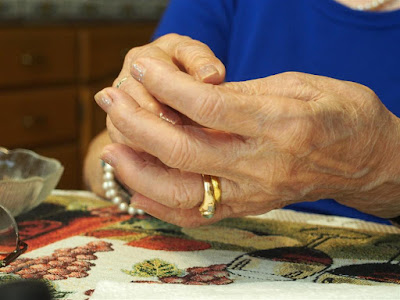
She has amazing hands, I just love them!
a game of War with Owen and Grace, Grandma totally won the game, inspite of Owen's smack talk.  And finally Owen's selfie with Great-Grandma.  This sort of cracks me up and fills up my heart.